

Photographing the northern lights during your stay in Finnish Lapland is a magical experience that requires some preparation. To capture this natural wonder, you’ll need a camera with manual settings, a sturdy tripod, and basic knowledge of night photography. The best results come from using wide-angle lenses, high ISO settings (800-3200), slow shutter speeds (5-15 seconds), and a wide aperture (f/2.8-f/4). Patience is key, as aurora displays vary in intensity and can appear suddenly in clear, dark skies away from light pollution.
Understanding northern lights photography basics
Northern lights photography presents unique challenges and rewards that differ from typical landscape or portrait photography. The magical dance of the auroras against the dark Finnish sky requires specific techniques to capture effectively. When photographing the aurora borealis, you’re essentially attempting to capture moving light in dark conditions—a scenario that pushes the limits of most camera equipment.
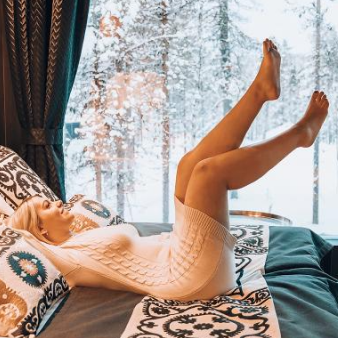
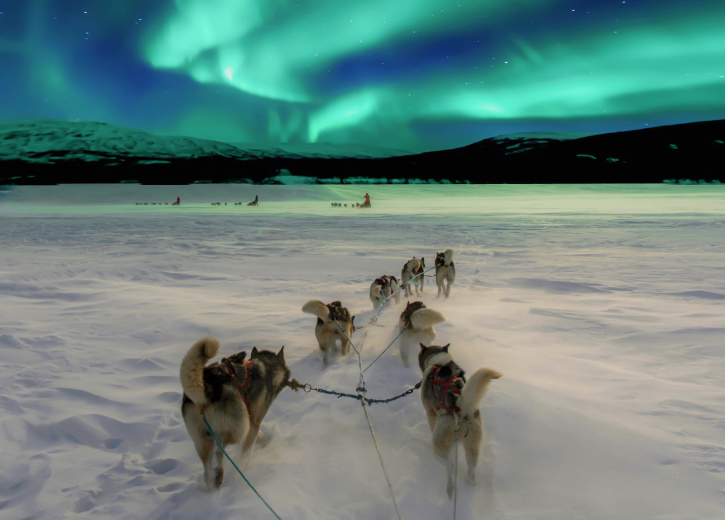
Northern Finland offers exceptional opportunities for aurora photography due to its location within the aurora oval—the zone where northern lights activity is most frequent and intense. The minimal light pollution in Lapland’s wilderness creates ideal conditions for clear aurora viewing. From the comfort of a glass-ceiling igloo, you can observe and photograph the dancing lights without battling the extreme cold for extended periods.
The contrast between the snow-covered landscape and the colourful sky creates a magical canvas for photographers. Even if you’re a beginner, understanding a few basic principles will help you capture memorable images of this natural phenomenon.
What camera equipment do I need to photograph the northern lights?
To successfully photograph the northern lights, you’ll need specific gear that can handle low-light conditions and cold temperatures. A DSLR or mirrorless camera with manual settings is essential, as automatic modes typically can’t handle the unique lighting conditions of aurora photography.
For lenses, prioritise a wide-angle option (14-24mm) with a fast aperture (f/2.8 or wider) to capture more of the sky and allow maximum light into your sensor. Kit lenses can work in a pinch, but their typically slower apertures (f/3.5-5.6) will limit your results.
A sturdy tripod is non-negotiable, as you’ll be using long exposures where any camera movement will blur your images. Look for one that remains stable in snow and won’t become brittle in sub-zero temperatures.
Additional essential items for the Finnish winter conditions include:
- Extra batteries (cold temperatures drain batteries quickly)
- Remote shutter release or timer to avoid camera shake
- Headlamp with red light to preserve night vision
- Hand warmers for both your hands and camera gear
- Microfiber cloths for lens condensation
Remember that Finnish winter nights can be extremely cold, so dress appropriately with thermal layers, insulated boots, and quality gloves that still allow camera operation.
What are the best camera settings for northern lights photography?
The optimal camera settings for northern lights photography require balancing exposure time with the movement of the aurora. Start with these baseline settings and adjust based on the intensity and movement of the lights:
- ISO: 1600-3200 (higher for fainter auroras, lower for brighter displays)
- Aperture: As wide as possible (f/2.8 or wider is ideal)
- Shutter speed: 5-15 seconds (shorter for fast-moving auroras, longer for static displays)
- White balance: Auto or between 3200-4000K
- Focus: Manual, set to infinity (∞) then slightly back
When photographing through glass, such as from inside an igloo, position your lens as close to the glass as possible and use a lens hood or dark cloth to minimise reflections. Turn off interior lights to prevent unwanted reflections in the glass.
For focus, autofocus rarely works in dark conditions. Instead, use manual focus and either focus on a distant bright star or use your camera’s live view with magnification to ensure sharpness. Take test shots and adjust accordingly—proper focus is crucial for capturing the intricate details of the aurora.
Experiment with your settings as the intensity of the northern lights changes. Bright, active displays may require shorter exposures (3-5 seconds) to prevent overexposure and capture the movement, while faint auroras might need longer exposures.
When is the best time to photograph northern lights at Aurora Queen Resort?
The optimal season for northern lights photography in Finnish Lapland spans from late August to early April, with the peak viewing period between September and March. During these months, the dark winter nights provide extended hours for aurora observation, with the prime viewing window typically between 10 PM and 2 AM.
Weather conditions play a crucial role in successful aurora photography. Clear skies are essential, as clouds will obscure the display. The Finnish Meteorological Institute provides reliable aurora forecasts that track both solar activity and cloud cover, which can help you plan your photography sessions.
The phase of the moon also affects aurora visibility and photography. Nights with little or no moonlight (around the new moon) provide darker skies that make the auroras appear more vivid. However, a bit of moonlight can beautifully illuminate the snowy landscape, creating a more dimensional photograph.
Plan to be patient and flexible with your schedule. The northern lights can appear suddenly and last for varying durations—from brief flashes to hours-long displays. Being ready to photograph at multiple times throughout your stay increases your chances of capturing spectacular images.
How can I compose stunning northern lights photographs?
Creating compelling northern lights photographs requires thoughtful composition that goes beyond simply pointing your camera at the sky. Include foreground elements to add depth, scale, and storytelling to your aurora images. Snow-covered trees, wooden cabins, or even a silhouette of a person gazing upward can transform a simple sky shot into an evocative scene.
The “rule of thirds” works well for aurora photography—place the horizon in the lower third of your frame if the sky display is spectacular, or in the upper third if the landscape elements are particularly interesting. This creates a more balanced and engaging composition than simply dividing the frame in half.
Look for reflections in water bodies or on the glassy surface of ice when conditions permit. These mirror images of the northern lights can create symmetrical compositions with striking visual impact. Even the snow can reflect the colourful lights, adding another dimension to your photographs.
Don’t forget to occasionally turn your camera vertically (portrait orientation) to capture tall, dramatic aurora formations that extend high into the sky. This works particularly well when the lights form curtain-like patterns.
If you’re lucky enough to spot a fox or other wildlife during your aurora session, including them in your composition creates a truly special image that captures the magical essence of Lapland.
Key takeaways for memorable northern lights photography
To capture truly memorable northern lights photographs during your stay in Finnish Lapland, remember these essential tips:
- Prepare your equipment before nightfall—charge batteries, format memory cards, and preset your camera settings
- Scout potential shooting locations during daylight hours to identify interesting foreground elements
- Dress much warmer than you think necessary—photography involves standing still in the cold for extended periods
- Protect your gear when moving between cold outdoor environments and warm indoor spaces to prevent condensation
- Consider shooting in RAW format to allow more flexibility in post-processing
- Take multiple exposures of the same scene to blend later or create time-lapse sequences
While capturing photographs is wonderful, remember to also take time to simply experience the northern lights with your own eyes. The cameras we use can never fully capture the emotional impact of witnessing this natural phenomenon in person.
Don’t be discouraged if your first attempts aren’t perfect—northern lights photography involves a learning curve and often improves with practice over several nights. Each aurora display is unique, offering new opportunities to refine your technique and capture the magic of Lapland’s winter skies.